Specs

  • 1440 × 1920 HD Resolution

  • 150° Vertical Field of View

  • Two-Way Audio Communication

  • Smart Motion Alerts with AI Detection

  • Infrared Night Vision Range up to 5 m

  • Cloud and Local Video Storage Options

  • Works on 2.4 GHz Wi-Fi Network

  • Compatible with Grand Alarms Smart Home App

  • Supports Apple and Android Devices

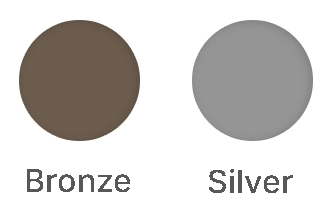
Colours

Documentation

Touchless Doorbell for the Video Doorbell Ultra + allows guests to stand in a designated area to ring the Video Doorbell without touching the device.

To enable the Touchless Doorbell feature

Using the App:

1. Log in to the Customer app.

2. Tap Video.

3. Tap

4. Tap Recording Rules.

5. Tap to edit an existing Video Doorbell Ultra + Video Analytics rule, or tap + Add New Rule.

6. Configure the rule as desired. For more information about Video Analytics rule configuration, see Configure a Video Analytics rule.

7. Tap the Enable Touchless Doorbell toggle to enable Touchless Doorbell.

8. Tap and drag to create an area where the guest can stand that triggers the Video Doorbell to ring.

9. Using the Duration Inside Area of Interest dropdown menu, select how long the guest must stay in the zone to trigger the Video Doorbell.

10. Tap Save.

Touchless Doorbell best practices

• The Ground Zone should be as small as possible to avoid unwanted doorbell triggers. The area should only cover

where the guest must step to trigger the doorbell.

• Avoid creating the Ground Zone in areas that have higher foot traffic (e.g., the path the user takes to check the mail).

• It is recommended to offset the trigger area from the front door to avoid situations where a guest might press the doorbell button before the Touchless Doorbell feature is triggered.

Example: Create the Ground Zone on a portion of the bottom step of the porch instead of directly in front of the door.

Troubleshooting

The touchless doorbell is triggering outside the area of interest

• The Touchless Doorbell feature includes a buffer around the Ground Zone to ensure timely notifications.

• If the user receives notifications when guests are too far away from the Ground Zone, decrease the size of the Ground Zone and test again

Before you begin:

You will need to have completed the account setup from the Grand Alarms welcome letter.

The doorbell cannot connect to a 5G network. It is only compatible with 2.4G networks (which are the standard).
We advise factory restarting the doorbell before installing. Please see reference guide for instructions.

The doorbell camera comes with a standard 400 clips of recording per month. Once the 400th upload is reached,
the camera will no longer upload clips until a new month arrives and the clip limit is reset to 0. If the limit is reached then
you will need to manually turn on the recordings from the website to continue receiving clips in the new month when the clip limit resets. You can also call the office to increase your monthly clip limit for an additional monthly charge.

Doorbell Enrollment:

We recommend staying near the doorbell to ensure a strong connection while enrolling the doorbell for the first time.

1. Log into the alarm.com app.

2. Open the side menu and navigate to the “Doorbell Camera” tab

3. Tap the “+” on Android phones or the “Add New Camera” button on iPhone

4. Ensure the doorbell is flashing Green & Red, then tap “Next” or “Begin”

5. Name the device whatever you’d like. Ex. Front Doorbell. Tap “Next” 

6. You will now be prompted to connect to the doorbell’s temporary WiFi network. This process is different for Android and iPhone so please follow the instructions on the next page carefully.

Continue for iPhone:

7. On iPhone you will need to leave the app and navigate to the phone’s WiFi settings when prompted. (Settings > WiFi)

8. Once in the WiFi settings, select the Skybell’s temporary network named “Skybell_0000000000” and wait for it to connect. When you see the checkmark, you can head back into the app and continue to step 9. 

Continue for Android

7. The next step for Android is to select the Skybell’s temporary WiFi network from the list provided. It will look something like this “Skybell_0000000000” 

8. Once selected it will connect to the Skybell’s temporary WiFi.

Finishing Enrollment

9. Next, you will be asked to select your home WiFi network.

10. When you have selected your home’s WiFi network, carefully put in your home’s WiFi password and then wait for the doorbell to configure. This can take several minutes.

Setting Up Notifications

11. After connection with the doorbell and WiFi network is complete, there will be a pop-up that asks you to turn on the push notifications in order to receive alerts from the doorbell through the app.

12. You will also have the option to turn on notifications and recordings for a button push and motion detection. You can choose if you want only one or both options selected. These options will also be part of the pop-up after installation is complete.

13. The enrollment of your doorbell is now complete.

If you have changed your Wi-Fi password, network name or have gotten a new modem/router then you will need to reconnect your video doorbell within your alarm.com smartphone app.

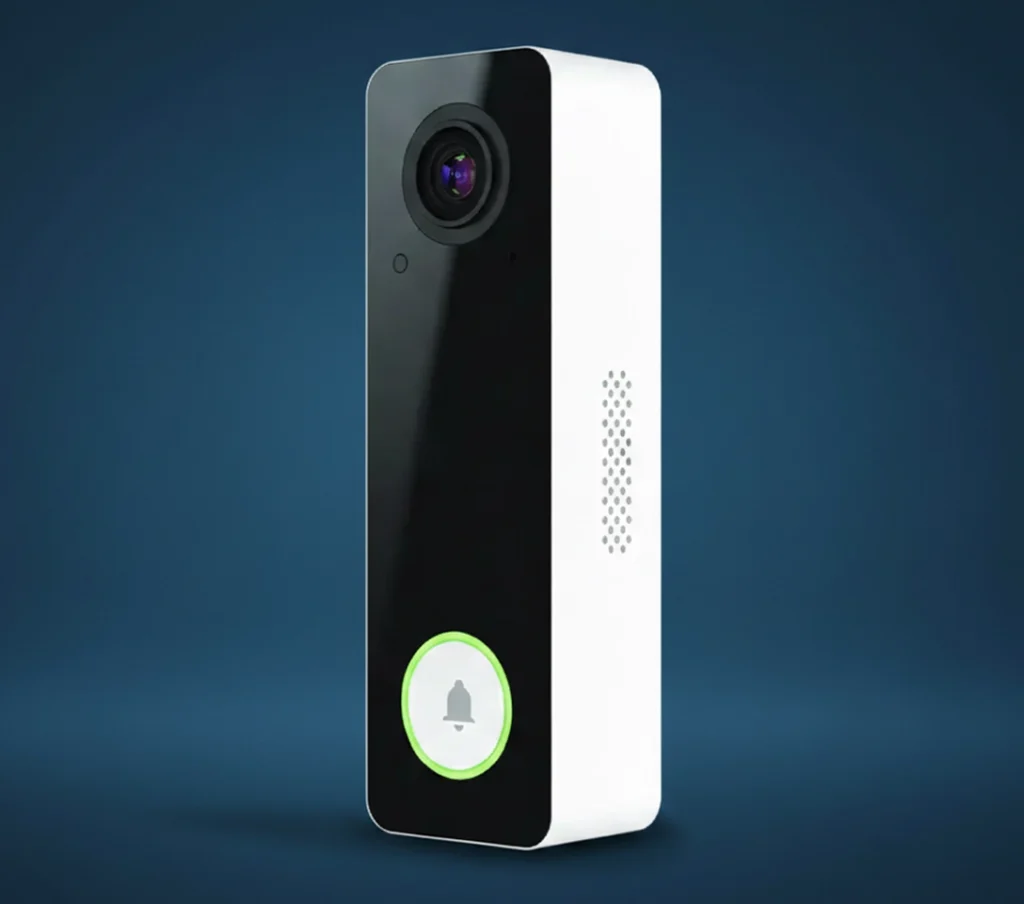
1. Put the doorbell into Access Point (AP) mode by holding the main button until the LED alternates green and red.

2. Log into the
Alarm.com App.

3. Tap Menu.

4. Tap Doorbell Camera.

5. Tap Settings.

6. In ‘Add Another Doorbell Camera’ tap Begin Installation.

If the ‘Add Another Doorbell Camera’ does not appear please call Grand Alarms customer support at 416-657-2100.

7. Proceed through the installation wizard. (This is the same process as the initial installation of the Doorbell Camera)


Power cycling the doorbell will only be needed if the doorbell is having a connection issue or video issue. A power cycle can help the doorbell update it’s firmware which can help to clear any trouble you may experience. To power cycle the doorbell just hold the doorbell button down until it begins to flash blue and then you can let go. Wait for the doorbell to power up (this may take a few minutes) and it should go back to solid green.

In order to factory reset the doorbell, you will need to hold the doorbell button down until it flashes yellow. This can take up to 80 seconds. A factory reset should only be done before enrolling the doorbell and only if there is an issue with the doorbell that the power cycle has not resolved. Once you do a factory reset, you will need to re-enroll the doorbell again.

  1. Log in to the app.
  2. Tap Video .
  3. Tap Configure.
  4. Select the desired video device. 
  5. Tap Video
  6. Adjust the saved video settings as desired. 
    • Using the Clip Resolution dropdown menu, tap to select the desired saved clip resolution.
    • Tap Clip Quality Settings to adjust the image quality and frame rate of saved clips. 
    • Tap Clip Length Settings to adjust alarm, camera-triggered, and event-triggered clips. Tap Save.
  1. Log in to the app.
  2. Tap Doorbell Camera.
  3. Tap Configure.
  4. Use the Call Volume slider to adjust the doorbell call volume.
  5. Tap Check.
  1. Log in to the app.
  2. Tap Video.
  3. Tap Configure.
  4. Tap Recording Rules.
  5. Tap Add New Rule, or tap Edit to edit an existing notification.
  6. Tap Video Analytics.
  7. Tap to select the ADC-VDB770.
  8. Tap Next.
  9. In Notify Recipients, tap to select the desired users to be notified.
  10. Configure the rest of the rule as desired. For more information about how to configure a Video Analytics rule, see
  11. Tap Save.
  1. Log in to the Alarm.com app.
  2. Click Video.
  3. Click Recording Rules.
  4. Click Edit on the desired rule.
  5. Using the Sensitivity slider, adjust the sensitivity up to increase the sensitivity or down to decrease the sensitivity.
  6. Click Save.

    Verify the Ground Zone is configured correctly

    • Avoid overlapping ground zones with objects that are prone to movement (e.g., such as trees, bushes, or other objects that move in the wind).
    • Only draw the rule where the feet of the person should enter.
      • Do not increase the size of the Ground Zone to cover the whole of the person.
      • Do not include walls, trees, or other structures in the rule/selection.
    • After observing what the rule detects over a few days, consider adjusting the Detection Sensitivity slider higher for more triggers or lower for fewer.

Help Videos

Pre-installation Steps

Power Module Installation

Wiring & Mounting

Call Notifications and Recording Rules

Call Actions

FAQs

Q: Can the Video Doorbell Pro+ send notifications to my security panel?

Yes. The Video Doorbell Pro+ can send alerts to supported control panels. It currently integrates with:

• Qolsys IQ Panel 2 – enable doorbell camera notifications directly on the panel.

• Qolsys IQ Panel 4 – enable doorbell camera notifications directly on the panel.

Note: Doorbell notifications do not appear on the IQ Remote.

The Video Doorbell Pro+ uses Video Analytics only. The analytics rules available are:

• One active Video Analytics rule per device.

• Only “Ground Zone” rules can be set.

• The system detects people only (no animals or objects).
Note: Notifications are sent instantly once a person is identified.

The LED ring colour cannot be manually customized.
Note: The light colour changes automatically to indicate different statuses or modes of the doorbell. Refer to your installation guide for LED behaviour details.

Yes. Any clip recorded with audio enabled will include sound when saved or played back.

You can view the live feed anytime through the Grand Alarms Smart Home App or Customer Web Portal. Additionally, live video can be streamed on these compatible panels:

• Qolsys IQ Panel 2 – stream live video from the Video Doorbell Pro+.

• Qolsys IQ Panel 4 – stream live video from the Video Doorbell Pro+.

The MAC address is printed directly beneath the QR code located under the back cover of the Video Doorbell Pro+. It’s also printed on the product packaging and included reference sheet for easy access.

Refer a Friend or Family Member

When someone you refer joins Grand Alarms, you’ll receive 2 months of free service as a thank-you.

Need More Help?

Specs

  • 1440 × 1920 HD Resolution

  • 150° Vertical Field of View

  • Two-Way Audio Communication

  • Smart Motion Alerts with AI Detection

  • Infrared Night Vision Range up to 5 m

  • Cloud and Local Video Storage Options

  • Works on 2.4 GHz Wi-Fi Network

  • Compatible with Grand Alarms Smart Home App

  • Supports Apple and Android Devices

Available Colours

Documentation

Touchless Doorbell for the Video Doorbell Ultra + allows guests to stand in a designated area to ring the Video Doorbell without touching the device.

To enable the Touchless Doorbell feature

Using the App:

1. Log in to the Customer app.

2. Tap Video.

3. Tap

4. Tap Recording Rules.

5. Tap to edit an existing Video Doorbell Ultra + Video Analytics rule, or tap + Add New Rule.

6. Configure the rule as desired. For more information about Video Analytics rule configuration, see Configure a Video Analytics rule.

7. Tap the Enable Touchless Doorbell toggle to enable Touchless Doorbell.

8. Tap and drag to create an area where the guest can stand that triggers the Video Doorbell to ring.

9. Using the Duration Inside Area of Interest dropdown menu, select how long the guest must stay in the zone to trigger the Video Doorbell.

10. Tap Save.

Touchless Doorbell best practices

• The Ground Zone should be as small as possible to avoid unwanted doorbell triggers. The area should only cover

where the guest must step to trigger the doorbell.

• Avoid creating the Ground Zone in areas that have higher foot traffic (e.g., the path the user takes to check the mail).

• It is recommended to offset the trigger area from the front door to avoid situations where a guest might press the doorbell button before the Touchless Doorbell feature is triggered.

Example: Create the Ground Zone on a portion of the bottom step of the porch instead of directly in front of the door.

Troubleshooting

The touchless doorbell is triggering outside the area of interest

• The Touchless Doorbell feature includes a buffer around the Ground Zone to ensure timely notifications.

• If the user receives notifications when guests are too far away from the Ground Zone, decrease the size of the Ground Zone and test again

Before you begin:

You will need to have completed the account setup from the Grand Alarms welcome letter.

The doorbell cannot connect to a 5G network. It is only compatible with 2.4G networks (which are the standard).
We advise factory restarting the doorbell before installing. Please see reference guide for instructions.

The doorbell camera comes with a standard 400 clips of recording per month. Once the 400th upload is reached,
the camera will no longer upload clips until a new month arrives and the clip limit is reset to 0. If the limit is reached then
you will need to manually turn on the recordings from the website to continue receiving clips in the new month when the clip limit resets. You can also call the office to increase your monthly clip limit for an additional monthly charge.

Doorbell Enrollment:

We recommend staying near the doorbell to ensure a strong connection while enrolling the doorbell for the first time.

1. Log into the alarm.com app.

2. Open the side menu and navigate to the “Doorbell Camera” tab

3. Tap the “+” on Android phones or the “Add New Camera” button on iPhone

4. Ensure the doorbell is flashing Green & Red, then tap “Next” or “Begin”

5. Name the device whatever you’d like. Ex. Front Doorbell. Tap “Next” 

6. You will now be prompted to connect to the doorbell’s temporary WiFi network. This process is different for Android and iPhone so please follow the instructions on the next page carefully.

Continue for iPhone:

7. On iPhone you will need to leave the app and navigate to the phone’s WiFi settings when prompted. (Settings > WiFi)

8. Once in the WiFi settings, select the Skybell’s temporary network named “Skybell_0000000000” and wait for it to connect. When you see the checkmark, you can head back into the app and continue to step 9. 

Continue for Android

7. The next step for Android is to select the Skybell’s temporary WiFi network from the list provided. It will look something like this “Skybell_0000000000” 

8. Once selected it will connect to the Skybell’s temporary WiFi.

Finishing Enrollment

9. Next, you will be asked to select your home WiFi network.

10. When you have selected your home’s WiFi network, carefully put in your home’s WiFi password and then wait for the doorbell to configure. This can take several minutes.

Setting Up Notifications

11. After connection with the doorbell and WiFi network is complete, there will be a pop-up that asks you to turn on the push notifications in order to receive alerts from the doorbell through the app.

12. You will also have the option to turn on notifications and recordings for a button push and motion detection. You can choose if you want only one or both options selected. These options will also be part of the pop-up after installation is complete.

13. The enrollment of your doorbell is now complete.
If you have changed your Wi-Fi password, network name or have gotten a new modem/router then you will need to reconnect your video doorbell within your alarm.com smartphone app.

1. Put the doorbell into Access Point (AP) mode by holding the main button until the LED alternates green and red.

2. Log into the
Alarm.com App.

3. Tap Menu.

4. Tap Doorbell Camera.

5. Tap Settings.

6. In ‘Add Another Doorbell Camera’ tap Begin Installation.

If the ‘Add Another Doorbell Camera’ does not appear please call Grand Alarms customer support at 416-657-2100.

7. Proceed through the installation wizard. (This is the same process as the initial installation of the Doorbell Camera)


Power cycling the doorbell will only be needed if the doorbell is having a connection issue or video issue. A power cycle can help the doorbell update it’s firmware which can help to clear any trouble you may experience. To power cycle the doorbell just hold the doorbell button down until it begins to flash blue and then you can let go. Wait for the doorbell to power up (this may take a few minutes) and it should go back to solid green.

In order to factory reset the doorbell, you will need to hold the doorbell button down until it flashes yellow. This can take up to 80 seconds. A factory reset should only be done before enrolling the doorbell and only if there is an issue with the doorbell that the power cycle has not resolved. Once you do a factory reset, you will need to re-enroll the doorbell again.

  1. Log in to the app.
  2. Tap Video .
  3. Tap Configure.
  4. Select the desired video device. 
  5. Tap Video
  6. Adjust the saved video settings as desired. 
    • Using the Clip Resolution dropdown menu, tap to select the desired saved clip resolution.
    • Tap Clip Quality Settings to adjust the image quality and frame rate of saved clips. 
    • Tap Clip Length Settings to adjust alarm, camera-triggered, and event-triggered clips. Tap Save.
  1. Log in to the app.
  2. Tap Doorbell Camera.
  3. Tap Configure.
  4. Use the Call Volume slider to adjust the doorbell call volume.
  5. Tap Check.
  1. Log in to the app.
  2. Tap Video.
  3. Tap Configure.
  4. Tap Recording Rules.
  5. Tap Add New Rule, or tap Edit to edit an existing notification.
  6. Tap Video Analytics.
  7. Tap to select the ADC-VDB770.
  8. Tap Next.
  9. In Notify Recipients, tap to select the desired users to be notified.
  10. Configure the rest of the rule as desired. For more information about how to configure a Video Analytics rule, see
  11. Tap Save.
  1. Log in to the Alarm.com app.
  2. Click Video.
  3. Click Recording Rules.
  4. Click Edit on the desired rule.
  5. Using the Sensitivity slider, adjust the sensitivity up to increase the sensitivity or down to decrease the sensitivity.
  6. Click Save.

    Verify the Ground Zone is configured correctly

    • Avoid overlapping ground zones with objects that are prone to movement (e.g., such as trees, bushes, or other objects that move in the wind).
    • Only draw the rule where the feet of the person should enter.
      • Do not increase the size of the Ground Zone to cover the whole of the person.
      • Do not include walls, trees, or other structures in the rule/selection.
    • After observing what the rule detects over a few days, consider adjusting the Detection Sensitivity slider higher for more triggers or lower for fewer.

Help Videos

Pre-installation Steps

Power Module Installation

Wiring & Mounting

Call Notifications and Recording Rules

Call Actions

Frequently Asked Questions

Q: Can the Video Doorbell Pro+ send notifications to my security panel?

Yes. The Video Doorbell Pro+ can send alerts to supported control panels. It currently integrates with:
• Qolsys IQ Panel 2 – enable doorbell camera notifications directly on the panel.
• Qolsys IQ Panel 4 – enable doorbell camera notifications directly on the panel.
Note: Doorbell notifications do not appear on the IQ Remote.

The Video Doorbell Pro+ uses Video Analytics only. The analytics rules available are:
• One active Video Analytics rule per device.
• Only “Ground Zone” rules can be set.
• The system detects people only (no animals or objects).
Note: Notifications are sent instantly once a person is identified.

The LED ring colour cannot be manually customized.
Note: The light colour changes automatically to indicate different statuses or modes of the doorbell. Refer to your installation guide for LED behaviour details.

Yes. Any clip recorded with audio enabled will include sound when saved or played back.

You can view the live feed anytime through the Grand Alarms Smart Home App or Customer Web Portal. Additionally, live video can be streamed on these compatible panels:
• Qolsys IQ Panel 2 – stream live video from the Video Doorbell Pro+.
• Qolsys IQ Panel 4 – stream live video from the Video Doorbell Pro+.

The MAC address is printed directly beneath the QR code located under the back cover of the Video Doorbell Pro+. It’s also printed on the product packaging and included reference sheet for easy access.

Request your free quote

Looking for the best security company near you? Fill out this quick form, and one of our local security experts will call you back the same day.

Request your free quote

Looking for the best security company near you? Fill out this quick form, and one of our local security experts will call you back the same day.

Request your free quote

Looking for the best security company near you? Fill out this quick form, and one of our local security experts will call you back the same day.

Request your free quote

Looking for the best security company near you? Fill out this quick form, and one of our local security experts will call you back the same day.